Search This Blog

Tuesday, December 11, 2012

Healthy Buffalo (turkey) Meatballs

Its been a busy month so far down here in Florida. First, I completed my master's thesis and graduated! Yay!

Then, Ohio State beat Michigan, we got new couches, I began studying for my comprehensive exams, Chris and I attended a wedding, I started my holiday baking spree (more on that later), and this weekend we will enjoy some family time. 

                                        Go Buckeyes           Wood Stork seen at our pond

Hibiscus - Love December in FL

Brutus enjoying the new couches

In addition to all this fun, I've still been having some fun in the kitchen. As I explained in my last post, I love fried foods, but try to limit my intake as much as possible. To still enjoy my favorite foods, I've looked for yummy substitutions. I recently saw a recipe for healthy buffalo meatballs online (I forget where) and decided to make my own version of it. 

Healthy Buffalo Meatballs (w/ ground turkey)
1 package of ground turkey (~20 oz)
1 cup breadcrumbs (any kind)
1 cup shredded cheese
1 egg
1 cup panko breadcrumbs (preferably panko)
1 bottle buffalo wing sauce
1 bottle ranch or blue cheese dressing
oil
salt/pepper
celery for dipping
 Preheat the oven to 400 degrees. Mix the ground turkey, breadcrumbs, cheese and egg together. Roll the meat mixture into small meatballs and roll in the panko breadcrumbs. In a heated skillet that can be put into the oven (I used a cast iron skillet), lightly brown the meatballs. Finish cooking them in the oven (approximately 20-30 minutes, flipping halfway). When they're done, brush the meatballs with the buffalo sauce. Serve with celery sticks and enjoy!

Nice and toasty (careful, the pan is hot!)

Dinner!
What are your favorite junk food substitutions???


Friday, November 30, 2012

Easy Baked Onion Rings

I love me some fried food. French fries, fried chicken (especially Chinese food), fried seafood, and onion rings! However, I want to live past the age of 50 with some semblance of health, so I limit my intake of such foods. So, instead of living without all my favorites, I try to find healthier alternatives.

I've made a non-deep fried general tso, non-fried bang bang shrimp, kale chips, butternut squash fries, and now Baked Onion Ring!!!


Easy Baked Onion Rings
1 large onion (sweet, vadalia, or yellow)
1-2 cups milk (any kind... skim, half & half, buttermilk)
1-2 cups flour
2-3 cups bread crumbs (a combo of panko and seasoned is yummy)
salt
pepper
hot sauce (add to milk for a kick)

Preheat the oven to 450. Slice the onion is 1/2 in rounds and separate the rings (one onion makes plenty of rings... about two sheet pans worth). Dip the onion rings into the flour and place them on a cookie sheet. Put the cookie sheet into the freezer for about 15 minutes. Then, dip the frozen rings into the milk and then into the bread crumbs. Spray the rings with oil spray and bake for 12-15 minutes until golden brown.

Enjoy with ketchup!


What are your favorite healthy swaps? Please share!

Sunday, November 4, 2012

Stone Fruit Upside-Down Cake with Shout-out

One of my oldest and dearest friends, Analise, started her own food blog a few months ago. We have been friends since 3rd grade or so when we met in Girl Scouts (see my Samoa cake post) and we both share a love for strange nerdy humor and good food.

I enjoy her recipes, tips, advice, and wit so much and I think you will as well. So please, if you get a chance, check it out: www.galleykitchengal.com

This recipe is one of Analise's first posts. I have been using my own cast iron skillet for meats and frying but I had yet to use it for baking. This recipe, plus a bunch of overripe fruit, was the perfect excuse to give baking in my skillet a try.

I made this cake one afternoon and shortly thereafter took a bunch of it to the dog park to share with my friends, and then the next day to school. It was an overwhelming hit! The cake is buttery and light, with the sweet yet tart fruit on top. The best part of this cake is that you don't have to use certain fruits, just use whatever is on hand. I used a very overripe nectarine, a pear, a green apple, and some maraschino cherries.

Stone Fruit Upside-Down Cake
http://galleykitchengal.com/2012/06/23/iron-it-out-stone-fruit-upside-down-cake-in-a-cast-iron-skillet/

I'll let you check out her link for the recipe and I'll just give you my photos

Yummy late summer fruits

Sliced up, ready to go

Arranged all pretty (get creative!)

Golden and aromatic

Flipped out!

Check this out!

This cake get 5 stars for taste and 5 stars for easiness!!!

p.s. Please be careful with your skillet! They get very hot and its easy to forget that its hot and grab the handle. A good idea is to slip an oven mitt over the handle as soon as you take it out of the oven to protect yourself for a quick memory lapse. Don't ask me why I stress this...

p.s.s. Take care of your pan! Don't use soap on it and PLEASE don't put it in the dishwasher! Just scrub it with a little kosher salt, let it dry fully, and wipe it with oil before storing it. Keep your pan happy and you'll be happy!


Monday, October 15, 2012

New Orleans!

Instead of posting a recipe today, I'm going to share some of the photos I took of the food and French Quarter.

I went to New Orleans for the annual conference for the International Society of Developmental Psychobiology. This is a small conference (~200 people) that took place at The Hotel Monteleone.

This hotel is beautiful!


The Lobby (The hotel has been around for ages, was flooded during Katrina and then redone. Its beautiful and just a block from Bourbon Street in the French Quarter)

The rooms and beds were small, but what it lacked in size it made up for in location

My first stop, Cafe Du Monde for beignets and cafe au lait

This is the cafe, just next to the river front. All they serve is beignets and drinks (coffee and soda). Cash only (and ask for the check... they add tip when they tell you the price).

The French Quarter is full of beautiful buildings

and great street bands

NOLA is Emril's restaurant in New Orleans. I didn't go there (it got $$$$ on urban spoon)

Jackson Brewery

Jackson Square, across from the river front

Bourbon Street after dark (where the party happens)

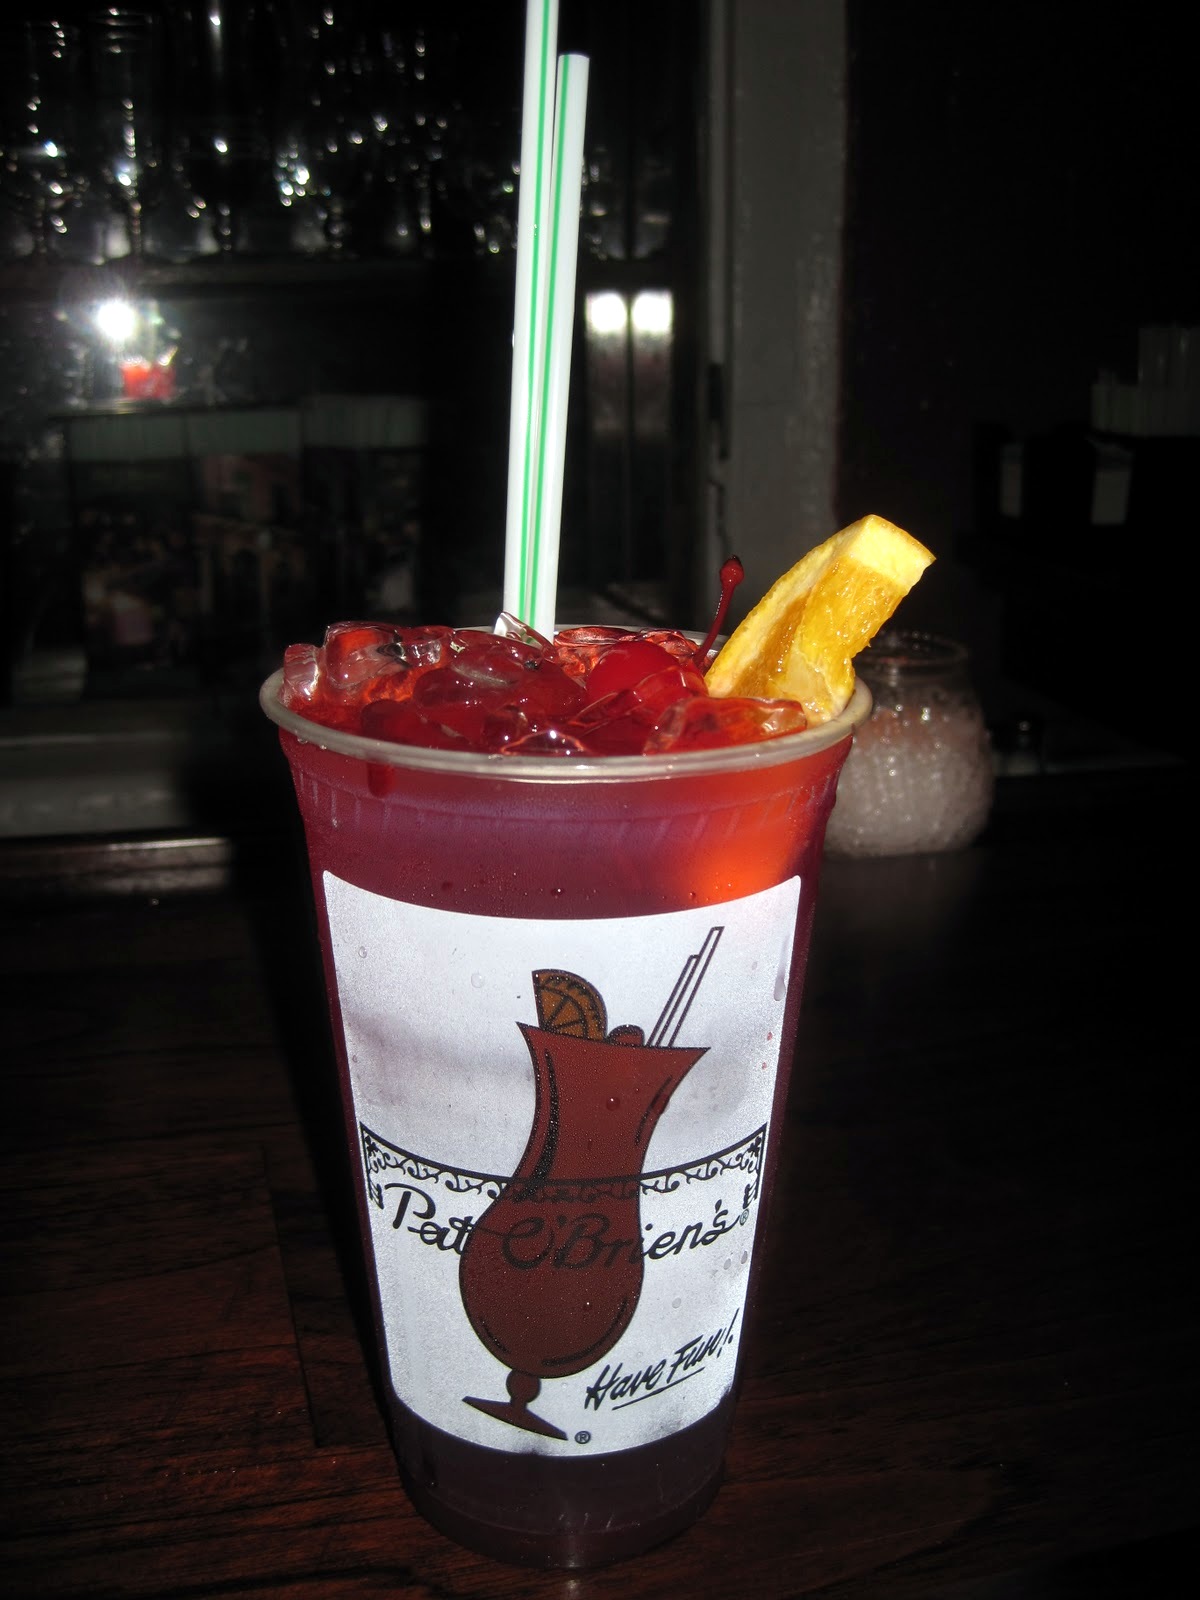
Hurricane from Pat O'Briens (famous for their hurricanes)!

Dinner on Wednesday: Bayou Burger
The Bayou Trifecta: red beans and rice, crawfish etouffee, cajun jambalaya

Also from Bayou Burger: Crawfish Beignets with Tobasco powered sugar
(Think conch fritter with sugar)

Thursday Lunch: Johnny's Po-Boys
This is a muffaletta. Its a sandwich with ham, salami, capicola, swiss cheese, provolone, and green olive and carrot relish. If you like green olives, you'll enjoy this sandwich (I sure did)

Before dinner: Hurricane from one of the slushy drink places, with a side of jello shot
Thursday Dinner: Royal House Oyster Bar
Seafood stuffed mushrooms (one of which was traded for an Oyster Rockefeller)

Hahahaha

Friday: Lunch at a local cafe. Got a 1/2 rubin, cup of spinach artichoke soup.
Snack: Sno-ball from Johnny's po-boys (wedding cake flavored). Pretty much a large snowcone.
Dinner: GW Fins - great food, high prices. I had an arugula salad with blue cheese and bruleed figs with the crab potstickers appetizer in a green pea butter

Saturday Lunch: Acme Oyster Bar
12 raw oysters on ice
shared a side of hush puppies and gumbo

This was my first time having raw oysters. I liked them... they were sweet/salty and very tender. Not slimy or chewy as I expected. This place is worth the wait to get in. 

Done. (again, traded one raw for a grilled oyster. I think I'd get the grilled oysters if I ever go again. It was yummy and cheesy)

Snack: Cafe Beignet
3 beignets, hurricane to drink
I think this place is better than Du Monde. Its cheaper, faster service, more selection (they have lunch items and quite a few baked goods to choose from), and I liked their beignets better. *gasp*

Oh yeah...! 

One last shot of the buildings. 

Overall, I really enjoyed my trip to New Orleans (or more specifically the French Quarter, as I didn't spend any real time outside of the FQ). I think a day or two is all I could take of it, but I would have liked to see more of the city and surrounding areas if I would have had more time.

Cons:

  • Kinda smelly (like garbage and vomit)
  • Expensive if you don't look around
  • Lots of crazy people. Wednesday night at 10pm, the place was crazy
  • Not great for young children, lots of drunks and topless ladies
Pros:

  • Can bring drink from one place into another place (usually)
  • Great food
  • Fun shops
  • Great pralines (eat lots of samples, they're expensive to buy)
  • Lots of great music to hear on the street
  • No open container laws, so feel free to roam around with a drink in hand
  • Voodoo shops!
  • Easy to walk around. I don't recommend driving because the streets are narrow, parking is limited, people like to jump into the street (me) and you'll be too drunk to drive most of the night anyways.


Thursday, October 4, 2012

Samoa Cake


This time of the year is full of fun fall treats. But sometimes, its nice to have something other than pumpkin, ginger, and peppermint. I'm talking about something that quickly jumps into our lives at the end of the winter, making a short appearance, and than disappearing as quickly as it came. I'm talking about Girl Scout Cookies!


I was a Girl Scout for many many years. I joined as a Brownie... I think I was just entering 3 grade. In Brownies, I met some of my best friends (one of whom was my maid of honor this past spring), and after that first year I went to Girl Scout Camp. I continued though scouts way past an age where it was "cool" and  went to camp every summer. When I turned 16 I became a camp counselor and later a camp lifeguard... in total I was part of the scouts for ~13 year!
Some areas call Samoas "Caramel deLites." 
This is a travesty and there is nothing "lite" about these cookies!

Of course, along with camp-outs, silly songs, and crafts, I sold plenty of cookies. My favorites were always Samoa (purple on the order form and box) and Thin Mints (dark minty green). When the order forms arrived, the first day to sell was always a snowy day (providing pity purchases from some of our neighbors), and they arrived a few weeks later. Invariably, we ate all the cookies within a week or two (depending on how well my mom hid them). And that's one of the reason why camp was so much fun...

See, after cookies sales are done, there are always plenty of cases leftover that are given to the local camps as a special treat for the campers. Every summer, deep in the camp's freezers, there were boxes and boxes of yummy girl scout cookies!

But alas, you are not a girl scout, nor a camper. And it is many months before you will have access to their amazing (albeit expensive cookies). So what should you do??? Make a Samoa Cake!!!

Samoa Cake
1 boxed white or yellow cake (with oil/egg/water as needed)
1/4 cocoa powered (optional)
3 cups coconut
Caramel Frosting (see below)
8 oz chocolate chips


First, prepare the cake batter as directed on the box. For a marbled cake, separate the batter into two bowl (roughly in half) and add the cocoa power to one bowl, mix to combine. Layer the batter into a (oiled and floured) bundt pan, and swirl it gently together. Bake as directed. Cool for a few minutes and then gently turn it out onto a plate.

In a 300 degree oven, toast the coconut (spread onto a large pan) for about 15 minutes, checking and stirring every few minutes. Meanwhile make the caramel frosting. When the cake is cool, frost it with the caramel frosting and pat the coconut into the frosting so that it sticks. Melt the chocolate chips, and drizzle the melted chocolate over the cake (this can be done easily by putting the chocolate into a plastic baggie, and cutting the tip off to use as a disposable pastry bag).

Caramel Frosting: http://www.pauladeen.com/recipes/recipe_view/caramel_frosting/

This cake makes a mess, but it is so yummy!

Wednesday, September 19, 2012

Maple Bacon Ice Cream!


How is fall going for everyone? Good? Great! I will soon have some yummy pumpkin recipes to share (Pumpkin Pie Bars anyone???), but right now, I want to share this amazing recipe with you.

A few weeks ago I was watching the food network and saw Claire Robinson make this ice cream. Maple Bacon Ice Cream? Huh? 

The more I thought about it, the more I had to make it. I bought the ice cream making attachment to my KitchenAid mixer a few months ago, and I've only had the chance to make a chocolate ice cream. This would be a great opportunity to use my purchase as well as enjoy some rich homemade yumminess. And Maple Bacon Ice Cream... How could I not make it?

Disclaimer: I do not want anyone to be fooled into thinking this is a healthy or to be made healthy recipe. This is pure indulgence (I mean, come on... its bacon ice cream). Treat it as so.

Maple Bacon Ice Cream
Ingredients
1 cup grade B maple syrup (I used light syrup from Log Cabin… if you’re a New Englander, feel free to gasp!)
4 cups half-and-half
1 1/2 cups sugar, divided
5 egg yolks
1/2 pound thick-cut bacon (about 6 slices)
Special equipment: Candy thermometer, ice cream maker


Directions
In a medium saucepan over moderate heat, reduce the maple syrup to 1/2 cup. Set aside.

Over moderate heat in a medium saucepan, heat the half-and-half with 1/2 cup sugar until hot and just bubbling around the edges.

In a medium bowl, whisk the yolks with 1/2 cup sugar, then add 1-cup hot half-and-half mixture in a slow stream, whisking constantly. Pour the whole egg mixture back into the saucepan and cook over medium heat, stirring constantly with a wooden spoon, until the mixture coats the back of the spoon and registers 170 degrees F on a thermometer (when I combined the egg mix with the cream, it was already at 170. I just turned the heat way down and let it hold its temp for a few minutes). Do not let boil. Pour the mixture through a fine mesh sieve into a medium bowl and whisk in the maple syrup. Cover with parchment paper letting the paper touch the surface of the mixture, to prevent a skin from forming. Chill the mixture until very cold, at least 6 hours and up to overnight.

Preheat the oven to350 degrees F.
Line a rimmed sheet pan with heavy foil. Place a baking rack over the lined sheet pan and arrange the bacon slices across the rack next to each other. Bake until crispy, about 15 minutes. When all the fat is rendered off, pat the warm bacon with paper towel to get as much of the fat off as possible. When cool enough to handle, finely chop.

Line a sheet pan with parchment paper and set aside. Place the remaining 1/2 cup sugar in the saucepan and cook over medium heat, stirring with a fork, until the sugar starts to melt. Stop stirring and cook until the sugar is a golden caramel color (keep an eye on the sugar, it will go from golden to burnt very quicky). Add the bacon and stir to coat. Pour onto prepared baking sheet and let harden. Chop  the candied bacon into small pieces.

Freeze the custard in an ice cream maker according to the manufacturer's instructions, 20 to 30 minutes and at the last minute, add the candied bacon and let churn until just combined. Transfer to an airtight container and freeze for at least 6 hours (or just dig in... I won't judge!)

Hint: Try adding some cayenne pepper to your chopped bacon before you stir it into the melted sugar (I'm going to try this next time).
Oh yeah... (Said in Ferris Bueller voice)

Sunday, September 16, 2012

Cheesy Roasted Tomato Soup

Back in June, I attended the International Conference on Infant Studies in Minneapolis. It was a great conference... I learned a lot and received great feedback on my publication. Also, my friend Lauren and I stumbled upon a great little restaurant called "The Local." We enjoyed our meal so much the first day that we went back the next day.

On The Local's menu, they have this incredible soup called Baked Cheddar and Tomato Soup. This soup is amazing! Creamy, tart, cheesy.


So of course, as soon as I came home I decided to make my own. Overall, I think its a pretty close replication of the Local's recipe. I think next time I make it, I'm going to also roast a potato or two with the other veggies so that I can get some of the creamy/starchy-ness from them.

Cheesy Roasted Tomato Soup
7 Roma/Plum tomatoes
1 Red bell pepper
1 Medium Red Onion
6-8 cloves garlic
2 medium potatoes, peeled (optional)
Olive oil
Balsamic Vinegar
4 leaves of basil
1/4 cup heavy cream
1 small can of tomato paste
32 oz veggie broth
8 oz sharp cheddar cheese + more for serving
salt & pepper
French bread
immersion blender

Preheat oven to 400 degrees. Oil the bottom of a 13x9 pan, and place veggies (tomatoes, pepper, onion, garlic, potatoes...largely chunked) into it. Drizzle a little more oil on top. Drizzle with balsamic vinegar, then sprinkle with salt and pepper, toss to coat. Put the pan into the oven for 20-25 minutes until well roasted, stirring once.

While the veggies are roasting, prepare the soup base. In a large soup pot (I used a large dutch oven for even heating), drizzle a few tablespoons of oil in. Put all of the tomato paste into the oil and stir over medium heat to smooth out. Pour in 3/4 of the carton of broth, and stir until well combined. When the veggies are done, use a slotted spoon to put them into the broth (you don't want too much of the oil from the roasting pan in the soup). Bring to a boil, then simmer for 15+ minutes until all the veggies are soft. Tear up the basil leaves and add into soup. If you want, you can add 1/4 cup of dry white wine (I did not do this). Add 1/4 cup of heavy cream and shredded cheese. Use an immersion blender to puree the soup until thick and creamy. Serve with more cheese and a large chunk of french bread.


Big pot o' yummy!

Update: I made this soup again... this time without peppers and added a good sized clump (~1/2 cup) of sundried tomatoes and a few tablespoons of pesto! Amazing!