Search This Blog

Showing posts with label baking. Show all posts

Thursday, July 25, 2013

Tips for Easier Grocery Shopping and Dinner Preparations

Tips for easier grocery shopping and dinner preparations

I'm the kind of person that does not like to go to the grocery store more than once a week. It's not that I don't like my grocery store, I actually really like it, but I find grocery shopping to be something that takes away from my puppy-cuddling-in-front-of-the-tv-time. Therefore, to maximize my shopping trips (not to mention my budget) I am a planner.

This is how I feel if I go to the store without a list. Total brain wipe.
To give you an idea of how I plan for my grocery trips and my meals, here's some tips and tricks I use:
Use the weekly ads. I get several ads a week, but the ones I concentrate my attention on are Publix and Penn-Dutch. For those of you outside of South Florida, Publix is a general grocery store. Their prices are sometimes a little higher than other stores in my area (such as Winn-Dixie or Walmart) but I like their selection (so I don't have to go to a second store to complete my list), quality, service  (I can always find someone to help me locate items on my shopping list and they never balk at my load of coupon), and location. I have a Publix less than half a mile from our apartment, which is critical when bringing home ice cream in August. Penn-Dutch is a local grocery store with two locations in my area (I try my best to buy from smaller companies when possible… not Walmart). They have amazing prices on produce, meat, and seafood (wild caught salmon for $4.99/lb, sushi grade tuna for $5.99/lb!) a good wine selection, some more unusual items (goat meat anyone?), but they don't have all my normal pantry items.

When I get the weekly ads, I make a list for each store (Publix, Penn-Dutch, Costco) based on the items on sale, keeping in mind ideas for meals and what I already have in my pantry. I love buy-one-get-one (BOGO) deals for things like pasta, pasta sauce, frozen items, etc. When I write out my list, I make a note of the price (for meat and produce), if it’s a BOGO, 10/$10, and brand or item information. That way, when I go to the store I know that its Ronzoni pasta on sale for BOGO not Bertolli brand or that it is the Fiji apples on sale not the Macintosh.

Coupons in weekend paper. I get the weekend paper just for the coupons and ads. Every few weeks, I sit down and cut out all the coupons for the items I want. I cut out the coupons for things I know I buy regularly (makeup, shampoo, pastas, etc) and some items that I may be interested in buying if I see them on sale (frozen meal: if they're BOGO plus I have a two $1.50 off coupons, I can get two mea

ls for almost nothing). Keep in mind that companies put out a lot of coupons for new items, like new lines of soup or granola bars, and many times these items will be on sale at the same time. If you aren't sure if you'd like these new items, cut the coupon and decide when you get to the store if it's worth the money. Sometimes they are. However, don't just buy stuff because you have a coupon. Buy it if it is something you will actually use and enjoy.

To maximize your coupons, its handy to buy a coupon organizer with dividers (see here). I have mine labeled by item type (Frozen, Meat/Produce, Pantry, Snacks, Dairy, Cleaning, Toiletries) to help me find the coupons I'm looking for while standing in the grocery aisle. I also sort through my coupons when I add more to throw away expired ones.   

Example of a coupon organizer... no need for anything complicated!
Plan a list of meals for the week. I like to plan a week's worth of meals before I go shopping. I base my plan on the items I have to use up in my freezer and what's on sale, typically writing out what I want to make for each night, which lets me not have to struggle to come up with something for dinner when I get home at 6. I also try to keep in mind what I want to eat for lunches as well as various snacks. I then add any last items onto my list based on my meal plans, making sure I have all the ingredients.

Keep an ongoing shopping list throughout the week. Did you use up the last egg? Almost out of baking powder? Put it on the list. This is also helpful for other family members to add items they want throughout the week (honestly, when you're making your list just before going shopping, you never remember the items you had been thinking about all week).

Re-write the list based on the layout of the store. This may sound like overkill, but a few minutes of re-writing my list saves me a lot of headache once I am in the store. I'm sure we've all missed items on our list only to have to run back across the store to get it. I avoid that by rewriting my list based on the aisles of the store, and this becomes easier as you get to know the store. At first, I was grouping items by type, but now I know that there is a aisle of paper goods between the international/candy aisle and the baking aisle and I can plan my list accordingly.

Stock up. This is not only for hurricane preparedness (I'm looking at you South Florida), this is good economic sense. There is nothing I hate more than buying a jar of pasta sauce full price because I ran out and I have a hankering for some spaghetti. When things you use regularly go on sale, but a lot of it. For me this includes ketchup, mayo, bbq sauce, pasta, sauce, canned tomatoes, and dark chocolate squares (I get two every day in my lunch bag. It is like an antidepressant for me). Also, if something catches your eye at the store and it's not on your list, buy it, just don't go crazy. I like being able to improvise my meals based on something I see in the store (yummy ripe peaches, a new marinade, etc).

Think outside the grocery store. Over a year ago, I joined an organic buying club (website is: http://www.anniesbuyingclub.com/) which allows me to get fresh organic produce for a great price. I get their ¾ box for $38 and that lasts me almost the whole two weeks between pick-up dates. Not only do I get fresh organic produce, but they try to have as much of it as possible locally sourced, it makes me try new varieties of produce, and it saves me a lot on my grocery bill.

Store food in a way that makes it easy to use. If you buy a 3 lb pack of ground beef, don't just throw the whole thing in the freezer (unless you plan to make a huge pot of chili) because you'll never use it. Portion out the beef (or chicken, or pork) into freezer bags in an amount you'd used in one dinner. After putting it into the bag, flatten it out as best you can, mark it with the contents and date purchased, then freeze it. That way, when you get home from work and realize you didn't take any meat out of the freezer to thaw, you can take it out of the freezer, put it into a sink with water, and it will be thawed in under 30 minutes, not three days. This also works great with shrimp (buy them with the shells on, way cheaper, and then freeze them flat in a bag). I once bought a 50 lb case of boneless skinless chicken breasts ($.69/lb, normally $3.99/lb) and broke them up into bags with 2-3 pieces per bag. We ate off that haul for months. Don't forget to ditch anything in the Styrofoam plates because even small items will take forever to thaw with the thermal protection of the "foam." This all takes time up front, but will make cooking dinner on a busy weeknight much easier. You can also do the same thing with produce by washing and chopping everything when you buy it for easy use in lunches and dinners throughout the week.

******************

Now, I use the above rules as much as I can. I plan meals and shop accordingly. But sometimes I don't. I get busy and when I get home I realize that I have no idea what I want to make for dinner, let alone have any defrosted meat. Therefore, below I've made a list of items I try to always have on hand to throw together healthy meals in under an hour.

Kitchen Staples to help you make dinner without a plan

·         Pasta (Spaghetti, fettuccini, macaroni, penne, farfalle, lasagna, orzo, etc)
·         Rice
·         Quinoa, couscous
·         Pasta sauces – marinara, vodka sauce, alfredo, pesto, clam
·         Frozen Veggies: peas, corn, broccoli, spinach, edamame
·         Fresh Veggies: broccoli, potatoes, tomatoes, lettuce, onion, garlic, carrots
·         Canned Veggies: Beans, Corn, Tomatoes, sundried tomatoes, water chestnuts/bean sprouts, bamboo shoots
·         Meat: Bacon, bags of frozen chicken tenderloins/cutlets (tenderloins are great because they can go straight from the freezer into the pan), Italian sausage, kielbasa, ground beef, pork, lunch meat
·         Asain: Hoisen, soy sauce, miren
·         Dairy: Cheese (shredded and block; Mexican and Italian blend, parmesan), butter, half & half, eggs
·         Baking: Flour, sugar, baking soda, baking powder, cocoa, brown sugar, powered sugar, chocolate chips, butter, vanilla extract
·         Herbs/Spices: Kosher salt, pepper, basil, oregano, cumin, chili power, garlic powder, onion flakes, thyme, sage, parsley, cilantro, mustard, ginger
·         Other: Honey, mustard, ketchup, bbq sauce, cornstarch, bread crumbs, mayo, panko, vinegar (red, cider, white), nuts, better than bouillon, hot sauce, jams/marmalades, salsa, tortillas

From this list, I can make 90% of my favorite meals. Here's a quick list: Stir-fry (both rice and noodle based, any meat you have), tacos (add corn and beans to the meat to stretch the meat), quesadillas (add veggies and refried beans for more nutrition), grilled chicken with tomato/peach marmalade sauce, cheesy noodle bake, casseroles, spaghetti and marinara sauce with ground beef,  vodka cream pasta with sausage, fried rice (with egg and kielbasa), bang-bang shrimp, rice pilaf (rice and orzo toasted, then water with bouillon added with frozen veg) etc.


I hope this list helps you out, even just a little. And PLEASE share your ideas for getting dinner on the table quickly with as low of a cost as possible!

Thursday, May 30, 2013

Guest Blogger: Ariel's Healthier Banana Bread

Hello everyone! I just wanted to introduce my amazing friend Ariel. Ariel and I have a great time baking together when we get time to hang out and we love sharing recipes. We've made a few things that have made it to this blog including Vanilla Bean Greek Yogurt Souffles and Saltwater Taffy. She has lovingly allowed me to post a recipe with some photos of a healthy version of banana bread that she made last week.

So please, lets give Ariel a warm welcome! *applause*

************

I eat a lot of bananas. Definitely at least one a day, more likely two. Due to this high consumption, I am often faced with the dilemma of what to do when they reach that too-ripe stage. I feel guilty throwing them away, but I also don’t love the texture of eating soft bananas. I used to just make a quick banana bread, but then I would watch that waste away because I didn’t want to eat it with all the sugar and butter used. In order to combat the guilty experience of throwing away too-ripe bananas, either in whole fruit or bread form, I started to search for a recipe that doesn’t use butter or tons of sugar. Here’s what I discovered:


Low-Fat Oatmeal Blueberry Banana Bread

I was super psyched about this recipe because not only does it omit butter, it uses Greek yogurt and only egg whites!! Plus, it adds oatmeal for a fiber boost. This bread is going to make a great breakfast.

1 cup all-purpose flour
1 cup uncooked old-fashioned oats
1/2 tsp baking soda
1/4 tsp baking powder
1/2 tsp cinnamon
1/4 tsp salt
3 bananas, very ripe
1/2 cup dark brown sugar
1 tsp vanilla extract
2 large egg whites
1 tablespoon plain greek yogurt
3/4 cup blueberries

Directions: (copied directly from the website)
1. Preheat oven to 350 degrees F. Grease a loaf pan and set aside. In medium bowl, stir together flour, oats, baking soda, baking powder, and cinnamon.
2. In separate medium bowl, mash bananas with fork. Add brown sugar and vanilla, mixing until smooth. Beat in egg whites and yogurt.
3. Combine wet and dry ingredients together for a somewhat smooth consistency. Gently fold in blueberries.
4. Pour into greased loaf pan and bake for 40-50 minutes, or until toothpick comes out clean.

This was so easy to make and came out so moist and delicious. The only modifications I made was using slightly more cinnamon and less blueberries because I only had about half a cup on deck.

Fresh from the oven!

***************

Thank you so much Ariel! 


Wednesday, January 23, 2013

Vanilla Extract


Vanilla Extract
Vanilla extract is probably one of the most often used baking staples out there. Along with flour, sugar, butter, salt, baking soda and baking powder, vanilla is essential to have in your kitchen if you want to do any baking. Even in recipes that you don't normally associate with a vanilla flavor probably have some vanilla extract in it, such as chocolate cake, chocolate chip cookies, peanut butter bars, etc. There are few items that are not enhanced by its flavor and aroma.

Vanilla, interestingly enough, comes from the dried seed pod of an orchid that grows in only a few places around the world (Mexico, Madagascar, Indonesia, and Fiji). The orchid has to be pollinated by either a specific species of bee (in Mexico where it is native) or by hand. After the pod is formed, where is looks like a green bean, it is picked and dried. That is when the deep flavor we associate with vanilla is developed. Vanilla pods are the direct source of vanilla flavoring, and can be quite pricey to buy (due to their rarity, difficulty to produce, and small cultivation areas). Vanilla extract is more commonly found and used in normal baking. Vanilla extract, however, is not always what it seems to be.

If you look closely in the grocery store, many of the bottles of vanilla extract that are for sale are from artificial (FAKE)nvanilla. And even the bottles labeled as pure vanilla extract aren't exactly the highest quality product (this isn’t surprising due to the cost of vanilla pods). The best way to ensure you have high quality vanilla extract is to make it yourself.

Make extract? Sounds complicated. But it's not! To make an extract, all you have to do is steep the vanilla pods in a tasteless alcohol, such as vodka.

First of all, you need to buy yourself some fresh, fragrant vanilla pods like these:


The top link has 16 large Madagascar vanilla beans (these are a highly prized variety known for their flavor) for $11.49 (as of today).  This may seem pretty expensive, but how much did that vanilla extract in your pantry cost, $2. For ~1 oz? And for what quality? You can find vanilla pods sometimes in your local grocery store or in specialty spice stores, but many times they've been sitting on the shelf for months, sometimes years.
Do yourself, and your baking, a favor and buy a few high quality pods.

I got this package as a present from my friend Analise! (She knows me well)

Now, to make the extract: To make about 8 oz of vanilla extract you'll need about 5 pods, depending on their size. I used a large mason jar and used about 8 pods.


First, slice the pod down the length of the pod using a sharp tipped paring knife.

Look at that lusciousness

Then, just drop the pods in to the container and cover in vodka (you can use bourbon, rum, or brandy, but those alcohols will impart some of their own flavor).


Finally, store your jar in a dark cabinet for ~6-8 weeks, shaking it up once in awhile to get things moving.
If you want to speed up the waiting time, just use your knife to scrape the seeds out of the pod and toss them in along with the pod. When you use your extract you may have some of the seeds come out with it, but that's ok! Those teeny little seeds are the black specks you see in high quality vanilla ice creams.

Done and ready to use!

Another great way to make small amounts of vanilla extract is to buy a few on those little single serving vodka bottles (like you get on airplanes) and drop in one split pod into each (you'll have to cut it in half to fit it in).

Vanilla extract is a great gift to give out during the holidays. Just make it a few months in advance in a large quantity, and then divide it into smaller jars to give away.

I personally go through about 16 oz of extract a year (I'm heavy handed with it when I'm baking) but most people will probably only need a few ounces to get them by.

…………………………………………

Now I know you're thinking, great, you made me buy 16 of these pods, but I only used up half of them in making all this extract! Now what?

Easy! The pods can be stored for a few months, just wrap them up tightly in a zip top bag and store them in a dark place. You can also make vanilla sugar by just slicing the pod and sticking it into a container of granulated sugar (you'd be amazing at how much specialty grocery stores charge for vanilla sugar) for a few weeks. Also, you can use scrapped out seeds in place of extract (it will be a stronger flavor and aroma) in cookies or cakes, or cook the pods in a custard/flan/ice cream base. If the pods are used in a custard base, just rinse them off, dry them well, and then put them into your sugar container (double use!).

I'm going to try to post a few recipes for some good vanilla uses in the next few weeks, so keep a look out and order yourself some vanilla pods in the meantime!

What are your favorite uses for vanilla??? Have you ever made your own extract, vanilla or otherwise???

Sunday, November 4, 2012

Stone Fruit Upside-Down Cake with Shout-out

One of my oldest and dearest friends, Analise, started her own food blog a few months ago. We have been friends since 3rd grade or so when we met in Girl Scouts (see my Samoa cake post) and we both share a love for strange nerdy humor and good food.

I enjoy her recipes, tips, advice, and wit so much and I think you will as well. So please, if you get a chance, check it out: www.galleykitchengal.com

This recipe is one of Analise's first posts. I have been using my own cast iron skillet for meats and frying but I had yet to use it for baking. This recipe, plus a bunch of overripe fruit, was the perfect excuse to give baking in my skillet a try.

I made this cake one afternoon and shortly thereafter took a bunch of it to the dog park to share with my friends, and then the next day to school. It was an overwhelming hit! The cake is buttery and light, with the sweet yet tart fruit on top. The best part of this cake is that you don't have to use certain fruits, just use whatever is on hand. I used a very overripe nectarine, a pear, a green apple, and some maraschino cherries.

Stone Fruit Upside-Down Cake
http://galleykitchengal.com/2012/06/23/iron-it-out-stone-fruit-upside-down-cake-in-a-cast-iron-skillet/

I'll let you check out her link for the recipe and I'll just give you my photos

Yummy late summer fruits

Sliced up, ready to go

Arranged all pretty (get creative!)

Golden and aromatic

Flipped out!

Check this out!

This cake get 5 stars for taste and 5 stars for easiness!!!

p.s. Please be careful with your skillet! They get very hot and its easy to forget that its hot and grab the handle. A good idea is to slip an oven mitt over the handle as soon as you take it out of the oven to protect yourself for a quick memory lapse. Don't ask me why I stress this...

p.s.s. Take care of your pan! Don't use soap on it and PLEASE don't put it in the dishwasher! Just scrub it with a little kosher salt, let it dry fully, and wipe it with oil before storing it. Keep your pan happy and you'll be happy!


Tuesday, May 8, 2012

French Toast Bread Pudding

I love bread pudding! I love french toast!

OMG


Warm, gooey, sweet... it smells like a fun family breakfast.

I made this recipe for Easter morning. Bread pudding recipes are great for busy families because they can be made ahead of time and popped into the oven when needed.

Another thing I like about this recipe is that the ingredients are a little more wholesome than other recipes I saw online. Most called for either tube cinnamon rolls or frozen french toast sticks. This recipe called for challah bread, which I picked up fresh from my grocery store bakery. This recipe can also be modified by using lower fat milk, light cream cheese, and low fat or sugar free maple syrup.

French Toast Bread Pudding
1 large Challah loaf, about 12oz, cut into 3/4 inch cubes, dried for several hours
7 large eggs
2 1/2 cup milk (I used 2 cups skim milk, 1/2 half and half)
1/2 cup sugar
2 tsp vanilla extract
3/4 tsp nutmeg or cinnamon (I used a little of both)

Butter or spray with cooking spray a 13x9 (or similar) size baking pan. Place the bread in the pan. Whisk eggs and the rest of the ingredients together; pour over bread. Using a spatula (or hands if you're like me) lightly press the bread into the egg mixture. Cover with foil and let it rest for at least an hour or overnight (keep refrigerated).

Place the foiled covered pan in the cold oven. Set oven to 350 and bake for 30 minutes. Remove the foil and bake for about 35 minutes until golden and puffy.

Cool for a few minutes before serving. I suggest serving it with a maple cream cheese frosting (see below)

Maple Cream Cheese Frosting
8 oz cream cheese (I used 1/3 fat), room temp
1/2 maple syrup
4-6 cups powered sugar

Optional: Chopped walnuts or pecans

In a mixer, beat the cream cheese and maple syrup together. Slowly add powered sugar cup by cup until it makes a thin frosting. Drizzle the frosting over the bread pudding. You can also add chopped pecans or walnuts if desired.


Warm from the oven, before the frosting was added

With the frosting, it soaked in more as it sat

Thursday, December 15, 2011

Vanilla Bean Biscotti

Last night I was trying to find a recipe for something that would be good to use the vanilla beans my future-sister-in-law sent me. There are plenty of recipes for vanilla bean pudding, cupcakes, and frosting out there, but I wanted something that would ship well, because I wanted to send some of the creation to said sister-in-law as a thank you and Christmas gift.


I found the following recipe for biscotti on foodgawker from The Galley Gourmet (http://www.thegalleygourmet.net/2011/01/vanilla-bean-biscotti.html). This was my first attempt at making biscotti. I've only had biscotti a few times with mixed results, it either being too hard to bite or flavorless, but I thought I'd give it a try.

Wow. This stuff is good. Its light, crisp, rich with vanilla flavor, and melts beautifully in coffee or tea (I had a piece with my morning chai). I love it! 

I'm going to have to explore the biscotti world a little more!

Vanilla Bean Biscotti
makes about 30, depending on the thickness you cut them

2 cups unbleached all-purpose flour
1 teaspoon baking powder
1/4 teaspoon kosher salt
1 cup white granulated sugar
6 tablespoons (3oz) unsalted butter at room temperature
2 extra large eggs at room temperature
1 long vanilla bean, split and seeds scraped using the back of a knife
1/4 cup Vanilla Sugar (sugar that has been stored with vanilla beans)

Preheat the oven to 325ยบ.  Line a large baking sheet with parchment paper.  In a medium bowl, whisk together the flour, baking powder, and salt.  In a large bowl, cream the butter, sugar, and vanilla bean seeds until light in color and fluffy.  Scrape down the sides of the bowl and add the egg, beating well.  Add the second egg and beat again.  Scrape down the sides.  Mix in the dry ingredients.

Transfer the dough to a lightly floured work surface.  Divide the dough in half and shape each half into a 12-inch long, 1 1/2-inch wide log (the dough will be very sticky... just do your best).  Transfer the logs to the baking sheet.  Bake until golden brown (dough will spread a lot), about 35-40 minutes.  The dough will be slightly soft to the touch.  Allow the dough to cool on the baking sheets for 20 minutes.  Maintain the oven temperature.

Carefully transfer the logs to a cutting board.  Using a sharp or serrated knife, cut a sliver off each end (those can be nibbled on).  Cut the logs into 3/4 -inch wide diagonal slices.  Place the biscotti cut side down on the baking sheets.  Sprinkle evenly with the vanilla sugar.  Return to the oven and bake for another 15-20 minutes.  Biscotti will still be barely soft in the center, but they will harden as they cool.  Cool on the baking sheets.  Store in an airtight container for up to a week.  Enjoy!


Friday, September 16, 2011

Lemon Macarons

Until this spring I don't think I had ever tried a macaron. I don't mean the chew coconut mound macaroons. I mean French Macarons. Very different.


Check out the cute "feet" on these little guys!


My friend Karen went to Paris and brought back a box of macarons from the famous shop in Paris called Laduree. Laduree specializes in macarons. And wow, they are yummy!


French macarons are two almond cookies with some sort of yummy filling. Many times they're made in unique flavors such as lavender, rose, green tea, raspberry, etc. I wasn't quite that daring, but I thought lemon would be very nice. I searched around awhile and found a recipe.


Now, after a quick google of macarons I discovered that they're not the easiest thing to make. Every website had a detailed and extensive list of tips and tricks to get them to turn out right. The almonds had to be ground just right, sometimes dried in the oven. The egg whites had to be aged; some say on the counter overnight, other said a few days in the fridge. Some call for only powered sugar, other for granulated that is pulsed with the almonds. Most talked about drying the batter after pipping for an hour. And on and on like this. Needless to say, I was undeterred.


I found a recipe that looked fairly moderate and held the plethora of tricks in my mind as I went along. I never completely follow a recipe, even when baking tricky items, and this was no exception. Below I've given the recipe for the macaroons I found. My changes are in red.


And yes, you will need a good kitchen scale. No macaron recipe is in volume.


Meyer Lemon Macarons
slightly modified from Tartelette


110g blanched almonds (or buy almond flour. I would do that next time)
200g powdered sugar
1 meyer lemon, grated peel of (I used lemon extract, about 1/4 tsp)
100g egg whites, aged for day and brought to room temperature (I put a bowl of ~3 egg whites on the counter overnight)
50g sugar
2 drops yellow food coloring (optional)
lemon curd (I found a nice lemon curd near the jams and jellies at the grocery store)


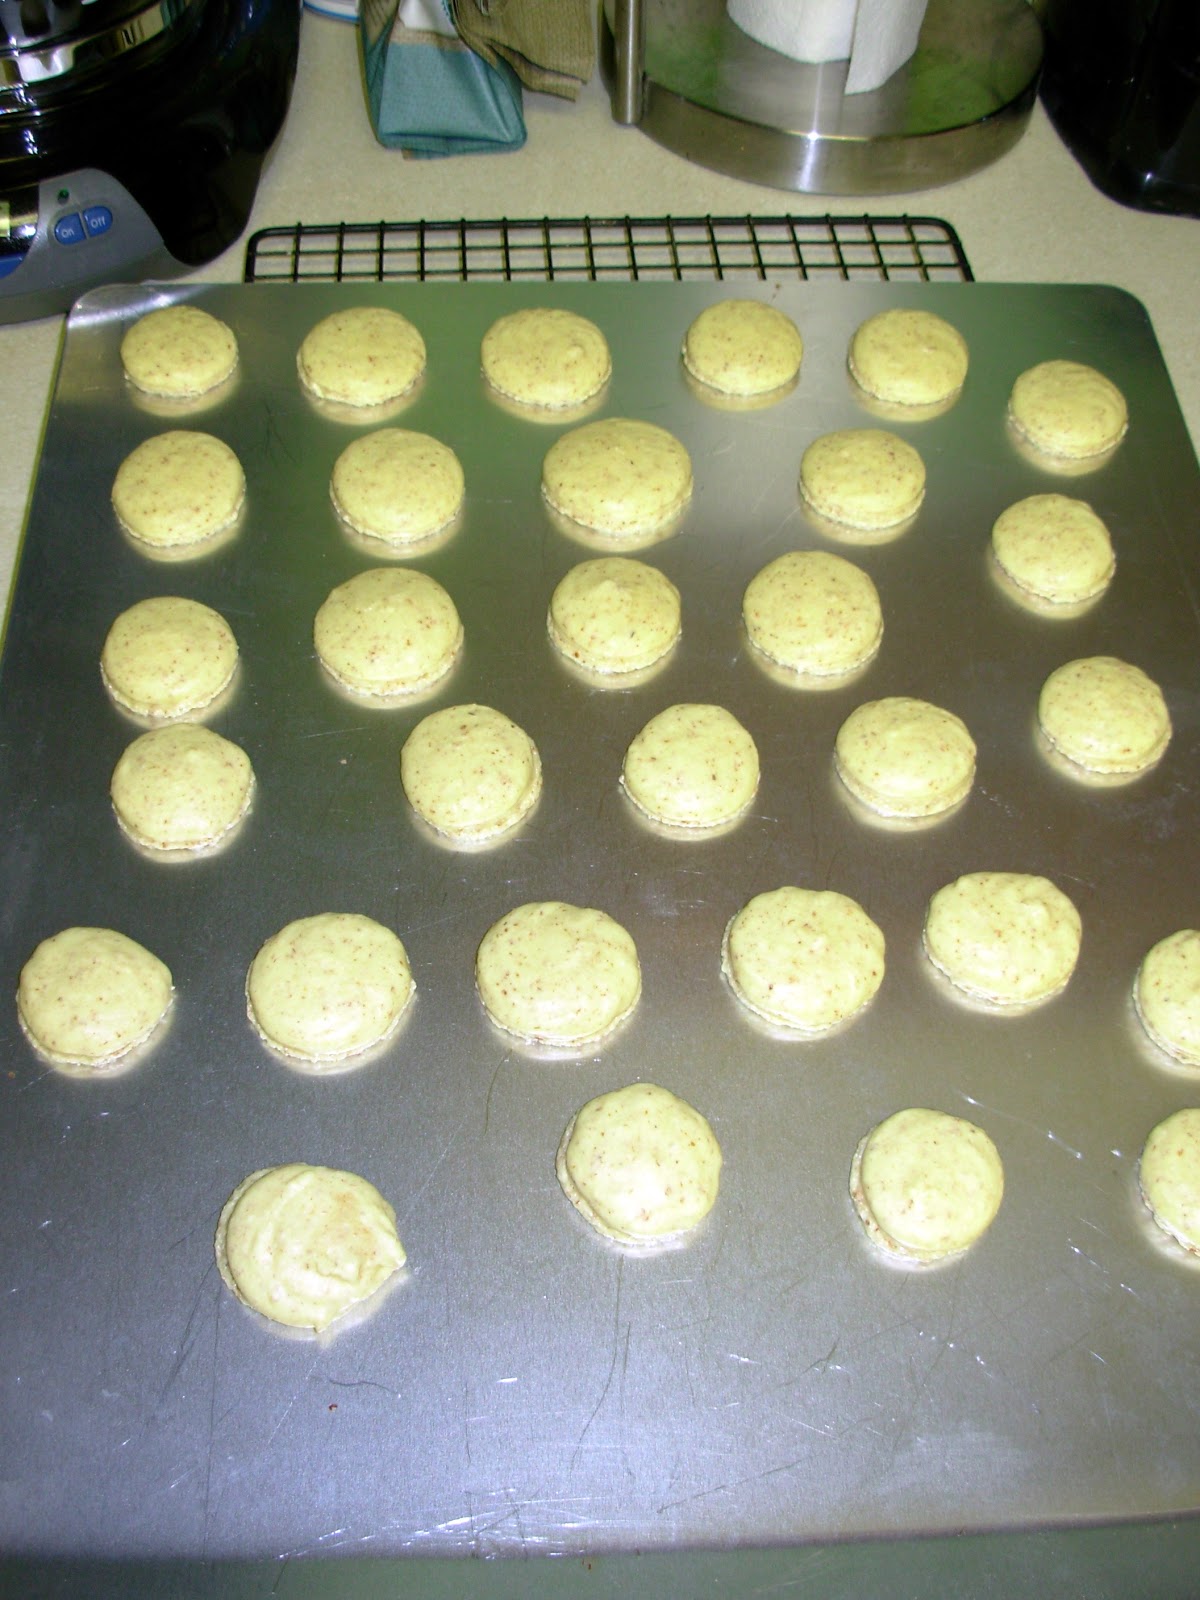
Macarons: (If not using almond flour...) Pulse almonds in a food processor until finely ground (Sift with a find mesh. Then sift again and re-weigh). Add powdered sugar and lemon zest. Pulse until well-blended (I mixed with a wisk. I'm a rebel like that). In a small bowl, mix the sugar and food coloring together until well blended (i.e the sugar turns yellow). Whip the egg whites until foamy and gradually (or just dump it in.) add the granulated sugar while whipping until a shiny meringue forms (but not too dry). Add the almond mixture to the meringue and quickly incorporate the mixture into the meringue while taking care not to overbeat. You want to achieve a batter that flows and “ribbons” for at least 5 seconds (aka settles without bumps). Pour the batter into a piping bag fitted with a large plain piping tip (Ateco 809 or 807(?, I used a large star tip because I didn't have a large plain tip)) and pipe small rounds onto a baking sheet lined with parchment paper (Trust me, use the parchment or a silpat. I didn't and I had to wire mine off and about half broke). The rounds should be about 1 1/2 inches in diameter and at least an inch apart. Let the macarons sit for an hour to develop a hard shell. Preheat oven to 300°F and bake for 8-10 minutes (10 minutes for me). Remove from oven and let cool. Remove from parchment.


Assembly: Pipe a small daub of lemon curd (a little goes a long way) onto a macaron and sandwich with a second macaron. Makes about 2 dozen.


Sticky little bastards wouldn't come off!


Finished product!

In the end, they came out alright. I'd say a 7 out of 10. They were really yummy, had a nice crispy shell and chewy interior, good feet, and the lemon curd was great. But you can see the almond pieces in the shell (it should be smooth), I didn't fold the batter long enough (notice the peaks in the picture) and they stuck like crazy to the baking sheet.

But I didn't get any complaints on their taste. And in the end, that's what counts!