Search This Blog

Showing posts with label eggs. Show all posts

Monday, November 11, 2013

An Egg-cellent Experiment

I like to think that I'm a pretty good cook. I cook or bake almost every day of the week, making simple dinner recipes as well as complex baked goods. I've had few problems making recipes that quickly bring most experienced cooks great pain… soufflés, French macaroons, roasts, turkeys, whole fish, etc. While I've had a few flops (for example: doubling the amount of butter in a cookie recipe), there are few recipes that trip me up more than once.

Except for hard-boiled eggs.

Dear lord, what happened to those eggs? 
I grew up eating hard-boiled eggs quite a bit. I love egg salad sandwiches, deviled eggs, potato salad (with egg), and eating hard-boiled eggs straight up with salt or soy sauce (try it, it's amazing!). Now, sometimes when my parents made hard-boiled eggs, the egg's shell would slide right off the egg in one piece. Other times, the shell would stick to the egg's white and would only come off with chunks of the white, destroying the look of the egg (not to mention wasting it). We would chalk up the differences in peeling ability to the eggs' freshness or lack thereof.

As for myself, I've had terrible luck making hard-boiled eggs down here in Florida. I make sure that I buy eggs a few weeks in advance before attempting to hard-boil them and I use my mother's method for cooking them:
Put eggs in pan with cold water (covering them by an inch or so of water)
Bring to a boil
Turn off burner, cover, and let sit for 12 minutes
Shock in an ice bath until cool
Peel and eat

Theoretically, the eggs should turn out perfectly cooked, with bright yolks (no green circle) and tender (not rubbery) whites.

This method, however, never seems to work for me. While my yolks are bright and my whites are tender, the peel sticks. Badly. My eggs come out looking like they've been peeled by someone with sporks for fingers. For pretty deviled eggs in my house, I've resorted to buying the eggs pre-cooked and peeled (such a waste of money).

So I did what anyone my age would do… I turned to Facebook. I implored my friends to help me out by telling me how they cook their eggs so that the shells come off. As it turns out, there are a lot of ways to cook eggs that "come out perfectly."

After many comments and suggestions, I boiled down (har har) the techniques into 6 variations of cooking time and peeling temps.
1.       Boil the water, add the eggs, boil for 7-10 minutes, then peel hot
      2.       My normal method: Add eggs to cold water, bring to a boil, sit covered for 12 minutes, shock in ice bath, peel cold
3.       Add eggs to cold water, boil for 5 minutes, shock in ice bath, peel cold
4.       Pampered Chef Method: Add eggs to cold water, bring to boil, simmer for 12 minutes, add ice & cold water, peel cold
5.       My normal method but peeled hot
6.       Bring eggs to room temp (about 1 hr), then boil in my normal method.
So, doing what any good scientist would do, I set out to perform an experiment (I am a researcher after all).

I bought 18 eggs, waited about 2 weeks, separated the eggs into groups of 3 (for 6 groups total… see, Math!) and cook the eggs in all six methods. I even used a Sharpie to label the eggs and took pictures of the results (see below).

After cooking, I peeled the eggs to test for difficulty of peel, and cut one open to see how they were cooked inside.


Results: None of the methods worked well.

Please, follow along as I discuss my results:
First, these are the eggs I purchased. These are plain white large eggs, purchased at my local Publix. I got 18 because I wanted plenty of eggs to work with and I wanted them to be from the same carton to keep everything as controlled as possible.
Here is the sell-by date. I purchased the eggs about 2 weeks prior to my attempt (11.10.13).
To demonstrate my method, here is a photo of three eggs in one of the pots I used to conduct this experiment. Note the number of the bottom of each egg. This allowed me to keep track of which eggs were in which group/cooking method.
Here is one of the eggs from group 1, unpeeled. Note the cracked shell from the heavy boiling for 8 minutes (sorry its blurry... cell phone camera wouldn't focus) 
Here are the peeled eggs from group 1. Pretty bad on two of them, third isn't terrible, but not unscathed.
Results from group 2, not pretty
Results from group three... pretty bad
Inside of individual from group 1. Not completely cooked. 
Inside of one egg from group 3 (only 5 minute boil). Very under cooked 
Don't worry, they didn't go to waste. They given a proper send off with flur de sel and white truffle oil
Results from Group 2 (my normal method). Center is fully cooked (just a tiny spot in the middle) with bright yellow yolk and tender white
Here are the results from group 4 (Pampered Chef Method). Cooked inside, but peel was pretty tough to get off. Better, but not good.
Group 5: My normal method, but peeled hot. Not only was this potentially very painful, the results were poor
Again, group 5, not completely cooked inside. I think it needed to rest in the cold water to finish cooking a bit inside
Group 6 - The room temp eggs, cooked normally. Fully cooked inside, peels came off with a bit of a struggle, but better than the rest.

What did I do with all those eggs? Deviled them, of course. Made with Sraracha mayo. Yum!
The rest will go in my lunch this week.
 Now, these are of course, not the only ways to hard boil eggs. Oh no. These methods include, but are not limited to, baking in the oven (the Alton Brown Method), adding vinegar to the cooking water, adding baking soda, adding salt, and using filtered water (although that could get pricey). Further research must be performed before a final analysis can be made.

Any hints, tips, suggestions, or voodoo curses I could use? Please, help me out... I want pretty eggs!

Sunday, March 24, 2013

Low Carb Food (even desserts!)

Hey everyone! Sorry I haven't posted in a long time (almost two months?)... its just been very busy around here. First we had Chris' parents visiting us, I had a huge exam at school, then we celebrated our 1 year anniversary in Disney World, and then had a major paper to write. All during this time, Chris and I started a low carb diet.


We aren't being super strict about it, and we aren't reading tons of Atkins books, but I'm just trying to eliminate as much bead, pasta, rice, potatoes, and sweets as I can. I'm not a big bread person, unless you bring me to a place with garlic bread or bread sticks, but I do love my pasta and rice. Especially at dinner, pasta and rice have long been a base for most of the foods I make. Dinner = pasta + sauce + meat + veggie... or rice + veggies + meat + sauce = stir-fry. What could be easier? Its been tricky trying to rework my dinner menu to be low carb, but I've figured out that I don't miss the starches all too much. 

I do however miss my sweets. I love to eat fruit and desserts. For breakfast and lunch, I love to eat fruit. But with this diet, I've tried to stick to lower sugar, high fiber fruits such as berries. But I still really miss my dessert at the end of the day (not every day, but as you know, I love to bake so a rich, special, treat now and then is really what I crave). I have allowed myself two pieces of dark chocolate after lunch (its almost an antidepressant for me) but I still was looking for some low carb baked goods. Thank god for the internet!

So to give you an idea of what we've been eating, I've been taking pictures of my dinners: 

Parmesan Chicken Tenderloins with Cauliflower Mash (with cheese and kale)

Burrito bowl: lettuce, chicken, a little quinoa, black beans, tomatoes, avocado, and cheese

Fried pork chops (yes, I used a little bread crumbs), cheddar brat, and spicy mayo kale salad

Chopped chicken stir-fry with broccoli and peas (this takes less than 15 minutes to make)

Chicken breast with sauteed mushrooms, kielbasa with collard greens, white beans, tomatoes, and spicy chicken broth

Chicken breast coated in cornstarch (less carbs than flour), with a raspberry chipotle glaze, and sauteed green beans and zucchini

Spicy Italian sausage, spicy garlic broccolini, and cloud/oopie bread (made with eggs and cream cheese... seriously)

Corned beef, cabbage and carrots (for St. Patrick's day)

Also, don't forget about my post on the wonders of Spaghetti Squash

Now, for dessert.

Dessert is a little harder to maneuver into a low carb territory due to the high sugar content of most items. But if you don't mind using a little fake sugar (don't mind if I do), its not hard to make a few great desserts.

Greek Yogurt Souffle


From: http://julesfood.blogspot.com/2012/10/greek-yogurt-souffle.html


1 cup plain greek yogurt...I use 0% Fage
3 large egg yolks
3 large egg whites
3 Tbsp AP flour
1/8 tsp salt
1 tsp vanilla extract or 1 vanilla bean (see I told you I'd give you other uses for the vanilla beans I convinced you to buy!)
1/8 tsp cream of tarter
1/4 cup sugar, or a sugar substitute like baking splenda
butter and "real" sugar for ramekins

Preheat oven to 375 F degrees, non convection.

Butter six 6oz ramekins.  Coat inside ramekin with sugar and knock out excess.  Set on baking sheet.

In a large mixing bowl whisk together yogurt, egg yolks, flour, salt and vanilla.  In a medium bowl or in your stand mixture, beat the egg whites and cream of tartar until foamy...then gradually pour in the sugar and whisk until firm, but soft peaks form...just don't whip so hard you break the whites. Add 1/3 of egg white mixture to the yogurt mixture and incorporate well.  Then, gently fold in another 1/3...then the remaining.  you want to keep as much volume as possible, of course. Divide evenly into ramekins, filled to about 3/4 to the top because when they fall you still want to have volume in the ramekin.

Bake on tray for about 15 minutes, until evenly risen and lightly browned around the edges.
DO NOT OPEN THE DOOR TO PEEK.

serve IMMEDIATELY for the full effect.
already falling, but still amazing!

These souffles are very easy to make. They remind me of a warm cheesecake. They do have a distinct 'greek yogurt' smell, but aren't as tart. We only ate two of them that afternoon, but the next day they were still so good. After they fall and cool, they are much more like a whipped cheesecake. I had mine for breakfast with blackberries. 

If you don't want to make them immediately, or you don't want all 6, you can mix them up, put them in the ramekins  and either refrigerate for two days or freeze for several months. Just bake them a few more minutes.

Approx. nutrition info
6 servings: 80 calories, 6.6 carbs, 2.5 fat, 2.3 sugar, 7.4 protein


Coconut Chocolate Mousse

adapted from: http://kojo-designs.com/2013/02/coconut-chocolate-mousse-quite-possibly-the-worlds-best-dessert/

This is another easy low carb dessert idea.


1 can of coconut milk (not lite). Some brands work better than others, but I used the first kind I found at publix (in the asian food section)

5 tablespoons of cocoa powder

2+ tablespoons of powered sugar (to taste, could probably substitute splenda because its so light)

pinch of salt (makes everything taste good, esp chocolate)

splash of vanilla extract

Directions: open the can of coconut milk and let it sit in a bowl overnight. If your can has a lot of runny coconut water on top, drain most of it off. This allows you to let the coconut solids to firm up. 

Combine the rested coconut milk with the cocoa and sugar and whip it with a mixer on a high speed until it gets fluffy (5-10 minutes). 

Time to eat! You can either spoon it into a bowl, eat it from the mixing bowl, or pipe it into fancy glasses rimmed in sugar.

These didn't taste super coconut-y but still very yummy!

Greetings from Disney World!

Thursday, January 26, 2012

Key Lime Pie

I've been in the mood for Key Lime Pie. Light, perky, and tart, key lime pie. Nothing tastes more of summer or Florida, and that sounds perfect for the end of January to me!


I've never made a traditional key lime pie before, only the Frozen Key Lime Pie I've written about previously. While I've had key lime pie a few times around the S. Florida area, I've never had a great desire to make one myself. There are a few types I've tried. Some have a thick layer of meringue on top like a lemon meringue pie, while other have just small dollops of whipped cream. Both are equally yummy, even if they don't have exactly the same consistency.

When trolling the internet I found recipes in both styles, but for me the deciding factor was, as usual, possible waste. The base of the key lime pie, the custard part, is made of egg yolks, sweetened condensed milk, and lime juice. And of course, to have egg yolks, you need to separate the yolks from the whites. While its easy to use the whites later in other recipes (or breakfast) I prefer to use them immediately so I don't forget they're sitting in the back of my fridge. Therefore, I selected a recipe that called for use of the egg whites in the meringue.

If you're in the mood for a summery treat, I highly recommend this recipe. Its so easy and has such a nice result. It can truly be made in under half an hour. I really hope you make this recipe.

Key Lime Pie
1 pre-made graham cracker crust (easy to find at all stores) or make your own (if you really want to... but the store bought ones taste the same
6 eggs, separated
1 can sweetened condensed milk
1/2 cup key lime juice (or regular lime juice)
Lime zest from 4 key limes, or 2 regular limes
1 cup sugar

In a mixer, beat the egg yolks with the sweetened  condensed milk until light and fluffy (about 8 minutes). Fold in the lime juice and zest until just combined. Pour into the pie crust and set aside.


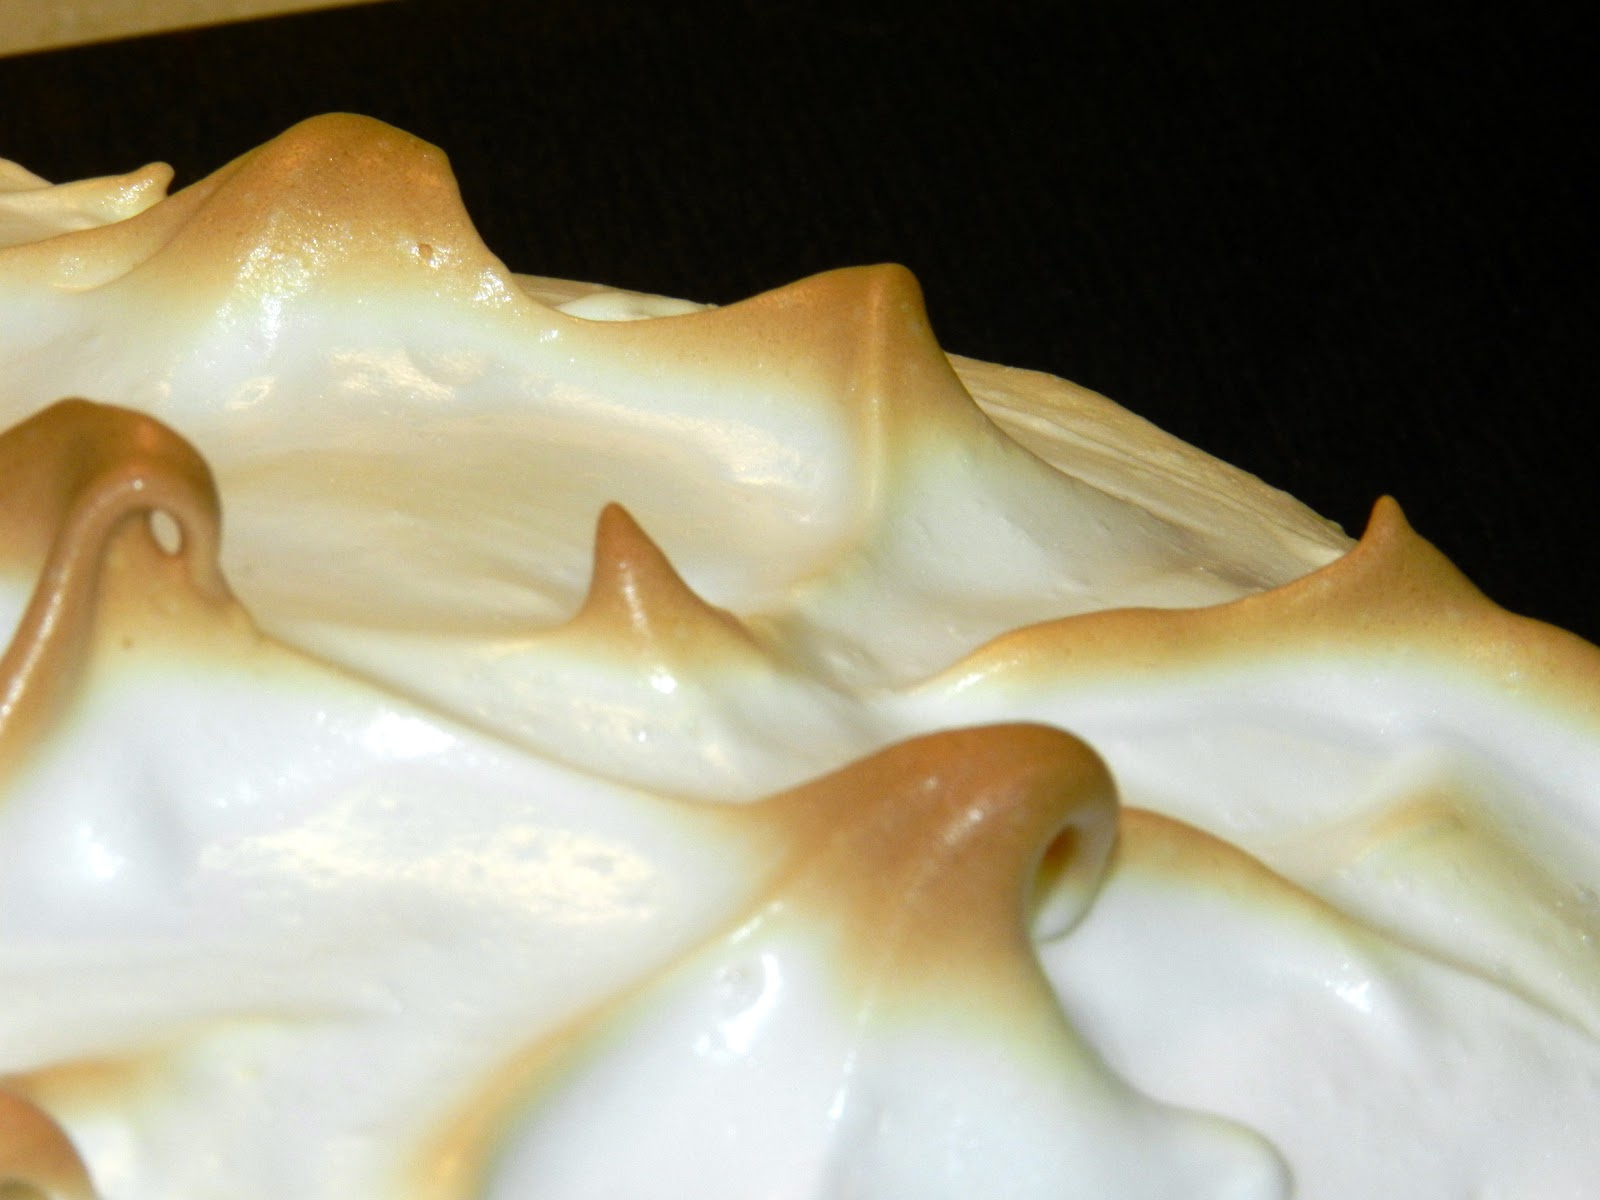
Preheat the oven to 350. In a very clean bowl, whip the egg whites into a foam (use some cream of tartar if needed). When the foam begins to build, pour in the sugar. Continue to whip until you get stiff peaks. Pour the meringue on top of the lime custard and move it around to cover. Put the pie in the oven (center rack) until the meringue gets gold tips (12-15 minutes in my oven, but keep an eye on it). Cool for 5 hours and enjoy!

yummmm

You can almost hear the ocean, right?

Saturday, December 31, 2011

Happy New Year! Holiday Roundup (highs and lows)

Happy New Year everyone! I hope everyone had a great holiday season and a happy and safe new year. 


I just want to thank everyone for making my blog a success (at least in my mind). I've had over 1000 hits since I began and its all because of you guys. I hope to continue posting new, fun, recipes for many years. As always, send me your ideas or questions... I love getting comments and suggestions.


As for my Christmas baking, I was a fairly unsuccessful this year. While my cookies and banana bread turned out great, I tried a few new things this year. Namely making eggnog and making eggnog creme brulee. While the eggnog turned out alright, I added to much rum and it was overwhelming. In hindsight, I shouldn't have added the  rum all at once, but glass by glass. It would have make it easier to control. Oh well.


Also, my eggnog creme brulee was disappointing. I found a recipe online that I thought looked good, but the spice blend was overpowering. I have a relatively low tolerance for nutmeg (it has a strange flavor to me) and this recipe had way too much for my taste. Also, my new creme brulee torch did not want to work, so after a few tense moments between myself, Chris, and the torch, we gave up and I broiled them instead. The sugar never really got the nice crispy top and it warmed the custard too much. Of course, I dumped the rest of the creme brulee and just for the hell of it I tried the torch again and it worked. Oh well. I'm going to try again with a simple vanilla creme brulee in the near future.


One thing that I made for Christmas that did work out was my Red Velvet Bread Pudding. I got the recipe from Paula Dean. I mean, anything with creme, butter, cream cheese, and cake must be good. Now, I'm attaching the original cake recipe from Paula Dean's/FoodNetwork's site, but I used a box cake. It had a great flavor and a nice rich color. Its a great time savor, especially because red velvet has a few odd ingredients (buttermilk, a ton of red food coloring).


Another thing I changed was instead of creaming the cream cheese with the sugar, I just mixed it into the sugar with a whisk. This left a few large chunks of cream cheese which was great to taste in the final product.


Red Velvet Bread Pudding

Ingredients

Red Velvet Cake:

  • 2 cups sugar
  • 1/2 pound (2 sticks) butter, at room temperature
  • 2 eggs
  • 2 tablespoons cocoa powder
  • 2 ounces red food coloring
  • 2 1/2 cups cake flour
  • 1 teaspoon salt
  • 1 cup buttermilk
  • 1 teaspoon vanilla extract
  • 1/2 teaspoon baking soda
  • 1 tablespoon vinegar

Bread Pudding Mix:

  • 3 cups half-and-half
  • 3 large eggs
  • 1 large egg yolk
  • Pinch salt
  • 1 teaspoon vanilla extract
  • 8 ounces cream cheese, at room temperature
  • 3/4 cup confectioners' sugar
  • Vanilla ice cream, for serving

Directions

Preheat the oven to 350 degrees F. Greased 9 by 13 by 2-inch sheet pan.
In a mixing bowl, cream the sugar and butter, beat until light and fluffy. Add the eggs 1 at a time and mix well after each addition. Mix cocoa and food coloring together and then add to sugar mixture; mix well. Sift together flour and salt. Add flour mixture to the creamed mixture alternately with buttermilk. Blend in vanilla.
In a small bowl, combine baking soda and vinegar and add to mixture. Pour batter into the prepared sheet pan. Bake for 20 to 25 minutes or until a toothpick inserted into the center comes out clean. Remove from heat and cool completely. When the cake is cooled, cut into 1-inch cubes.
Place cubes onto 11 by 17-inch cookie sheet. Place in oven for 10 minutes to toast (this keeps the cake from absorbing too much of the cream mixture).

Bread Pudding Mix:

Combine the half-and-half, eggs, egg yolk, salt, and vanilla in a medium bowl. With an electric hand mixer in a large bowl, beat the cream cheese and sugar until smooth. Mix in the half-and-half mixture.

Place the red velvet cubes in a large baking dish or 8 individual ramekins. Add the pudding mixture to the dish. Make sure the cake cubes are completely covered. Bake for about 30 minutes, or until the pudding is set. Serve warm with ice cream.