Search This Blog

Thursday, October 4, 2012

Samoa Cake


This time of the year is full of fun fall treats. But sometimes, its nice to have something other than pumpkin, ginger, and peppermint. I'm talking about something that quickly jumps into our lives at the end of the winter, making a short appearance, and than disappearing as quickly as it came. I'm talking about Girl Scout Cookies!


I was a Girl Scout for many many years. I joined as a Brownie... I think I was just entering 3 grade. In Brownies, I met some of my best friends (one of whom was my maid of honor this past spring), and after that first year I went to Girl Scout Camp. I continued though scouts way past an age where it was "cool" and  went to camp every summer. When I turned 16 I became a camp counselor and later a camp lifeguard... in total I was part of the scouts for ~13 year!
Some areas call Samoas "Caramel deLites." 
This is a travesty and there is nothing "lite" about these cookies!

Of course, along with camp-outs, silly songs, and crafts, I sold plenty of cookies. My favorites were always Samoa (purple on the order form and box) and Thin Mints (dark minty green). When the order forms arrived, the first day to sell was always a snowy day (providing pity purchases from some of our neighbors), and they arrived a few weeks later. Invariably, we ate all the cookies within a week or two (depending on how well my mom hid them). And that's one of the reason why camp was so much fun...

See, after cookies sales are done, there are always plenty of cases leftover that are given to the local camps as a special treat for the campers. Every summer, deep in the camp's freezers, there were boxes and boxes of yummy girl scout cookies!

But alas, you are not a girl scout, nor a camper. And it is many months before you will have access to their amazing (albeit expensive cookies). So what should you do??? Make a Samoa Cake!!!

Samoa Cake
1 boxed white or yellow cake (with oil/egg/water as needed)
1/4 cocoa powered (optional)
3 cups coconut
Caramel Frosting (see below)
8 oz chocolate chips


First, prepare the cake batter as directed on the box. For a marbled cake, separate the batter into two bowl (roughly in half) and add the cocoa power to one bowl, mix to combine. Layer the batter into a (oiled and floured) bundt pan, and swirl it gently together. Bake as directed. Cool for a few minutes and then gently turn it out onto a plate.

In a 300 degree oven, toast the coconut (spread onto a large pan) for about 15 minutes, checking and stirring every few minutes. Meanwhile make the caramel frosting. When the cake is cool, frost it with the caramel frosting and pat the coconut into the frosting so that it sticks. Melt the chocolate chips, and drizzle the melted chocolate over the cake (this can be done easily by putting the chocolate into a plastic baggie, and cutting the tip off to use as a disposable pastry bag).

Caramel Frosting: http://www.pauladeen.com/recipes/recipe_view/caramel_frosting/

This cake makes a mess, but it is so yummy!

Wednesday, September 19, 2012

Maple Bacon Ice Cream!


How is fall going for everyone? Good? Great! I will soon have some yummy pumpkin recipes to share (Pumpkin Pie Bars anyone???), but right now, I want to share this amazing recipe with you.

A few weeks ago I was watching the food network and saw Claire Robinson make this ice cream. Maple Bacon Ice Cream? Huh? 

The more I thought about it, the more I had to make it. I bought the ice cream making attachment to my KitchenAid mixer a few months ago, and I've only had the chance to make a chocolate ice cream. This would be a great opportunity to use my purchase as well as enjoy some rich homemade yumminess. And Maple Bacon Ice Cream... How could I not make it?

Disclaimer: I do not want anyone to be fooled into thinking this is a healthy or to be made healthy recipe. This is pure indulgence (I mean, come on... its bacon ice cream). Treat it as so.

Maple Bacon Ice Cream
Ingredients
1 cup grade B maple syrup (I used light syrup from Log Cabin… if you’re a New Englander, feel free to gasp!)
4 cups half-and-half
1 1/2 cups sugar, divided
5 egg yolks
1/2 pound thick-cut bacon (about 6 slices)
Special equipment: Candy thermometer, ice cream maker


Directions
In a medium saucepan over moderate heat, reduce the maple syrup to 1/2 cup. Set aside.

Over moderate heat in a medium saucepan, heat the half-and-half with 1/2 cup sugar until hot and just bubbling around the edges.

In a medium bowl, whisk the yolks with 1/2 cup sugar, then add 1-cup hot half-and-half mixture in a slow stream, whisking constantly. Pour the whole egg mixture back into the saucepan and cook over medium heat, stirring constantly with a wooden spoon, until the mixture coats the back of the spoon and registers 170 degrees F on a thermometer (when I combined the egg mix with the cream, it was already at 170. I just turned the heat way down and let it hold its temp for a few minutes). Do not let boil. Pour the mixture through a fine mesh sieve into a medium bowl and whisk in the maple syrup. Cover with parchment paper letting the paper touch the surface of the mixture, to prevent a skin from forming. Chill the mixture until very cold, at least 6 hours and up to overnight.

Preheat the oven to350 degrees F.
Line a rimmed sheet pan with heavy foil. Place a baking rack over the lined sheet pan and arrange the bacon slices across the rack next to each other. Bake until crispy, about 15 minutes. When all the fat is rendered off, pat the warm bacon with paper towel to get as much of the fat off as possible. When cool enough to handle, finely chop.

Line a sheet pan with parchment paper and set aside. Place the remaining 1/2 cup sugar in the saucepan and cook over medium heat, stirring with a fork, until the sugar starts to melt. Stop stirring and cook until the sugar is a golden caramel color (keep an eye on the sugar, it will go from golden to burnt very quicky). Add the bacon and stir to coat. Pour onto prepared baking sheet and let harden. Chop  the candied bacon into small pieces.

Freeze the custard in an ice cream maker according to the manufacturer's instructions, 20 to 30 minutes and at the last minute, add the candied bacon and let churn until just combined. Transfer to an airtight container and freeze for at least 6 hours (or just dig in... I won't judge!)

Hint: Try adding some cayenne pepper to your chopped bacon before you stir it into the melted sugar (I'm going to try this next time).
Oh yeah... (Said in Ferris Bueller voice)

Sunday, September 16, 2012

Cheesy Roasted Tomato Soup

Back in June, I attended the International Conference on Infant Studies in Minneapolis. It was a great conference... I learned a lot and received great feedback on my publication. Also, my friend Lauren and I stumbled upon a great little restaurant called "The Local." We enjoyed our meal so much the first day that we went back the next day.

On The Local's menu, they have this incredible soup called Baked Cheddar and Tomato Soup. This soup is amazing! Creamy, tart, cheesy.


So of course, as soon as I came home I decided to make my own. Overall, I think its a pretty close replication of the Local's recipe. I think next time I make it, I'm going to also roast a potato or two with the other veggies so that I can get some of the creamy/starchy-ness from them.

Cheesy Roasted Tomato Soup
7 Roma/Plum tomatoes
1 Red bell pepper
1 Medium Red Onion
6-8 cloves garlic
2 medium potatoes, peeled (optional)
Olive oil
Balsamic Vinegar
4 leaves of basil
1/4 cup heavy cream
1 small can of tomato paste
32 oz veggie broth
8 oz sharp cheddar cheese + more for serving
salt & pepper
French bread
immersion blender

Preheat oven to 400 degrees. Oil the bottom of a 13x9 pan, and place veggies (tomatoes, pepper, onion, garlic, potatoes...largely chunked) into it. Drizzle a little more oil on top. Drizzle with balsamic vinegar, then sprinkle with salt and pepper, toss to coat. Put the pan into the oven for 20-25 minutes until well roasted, stirring once.

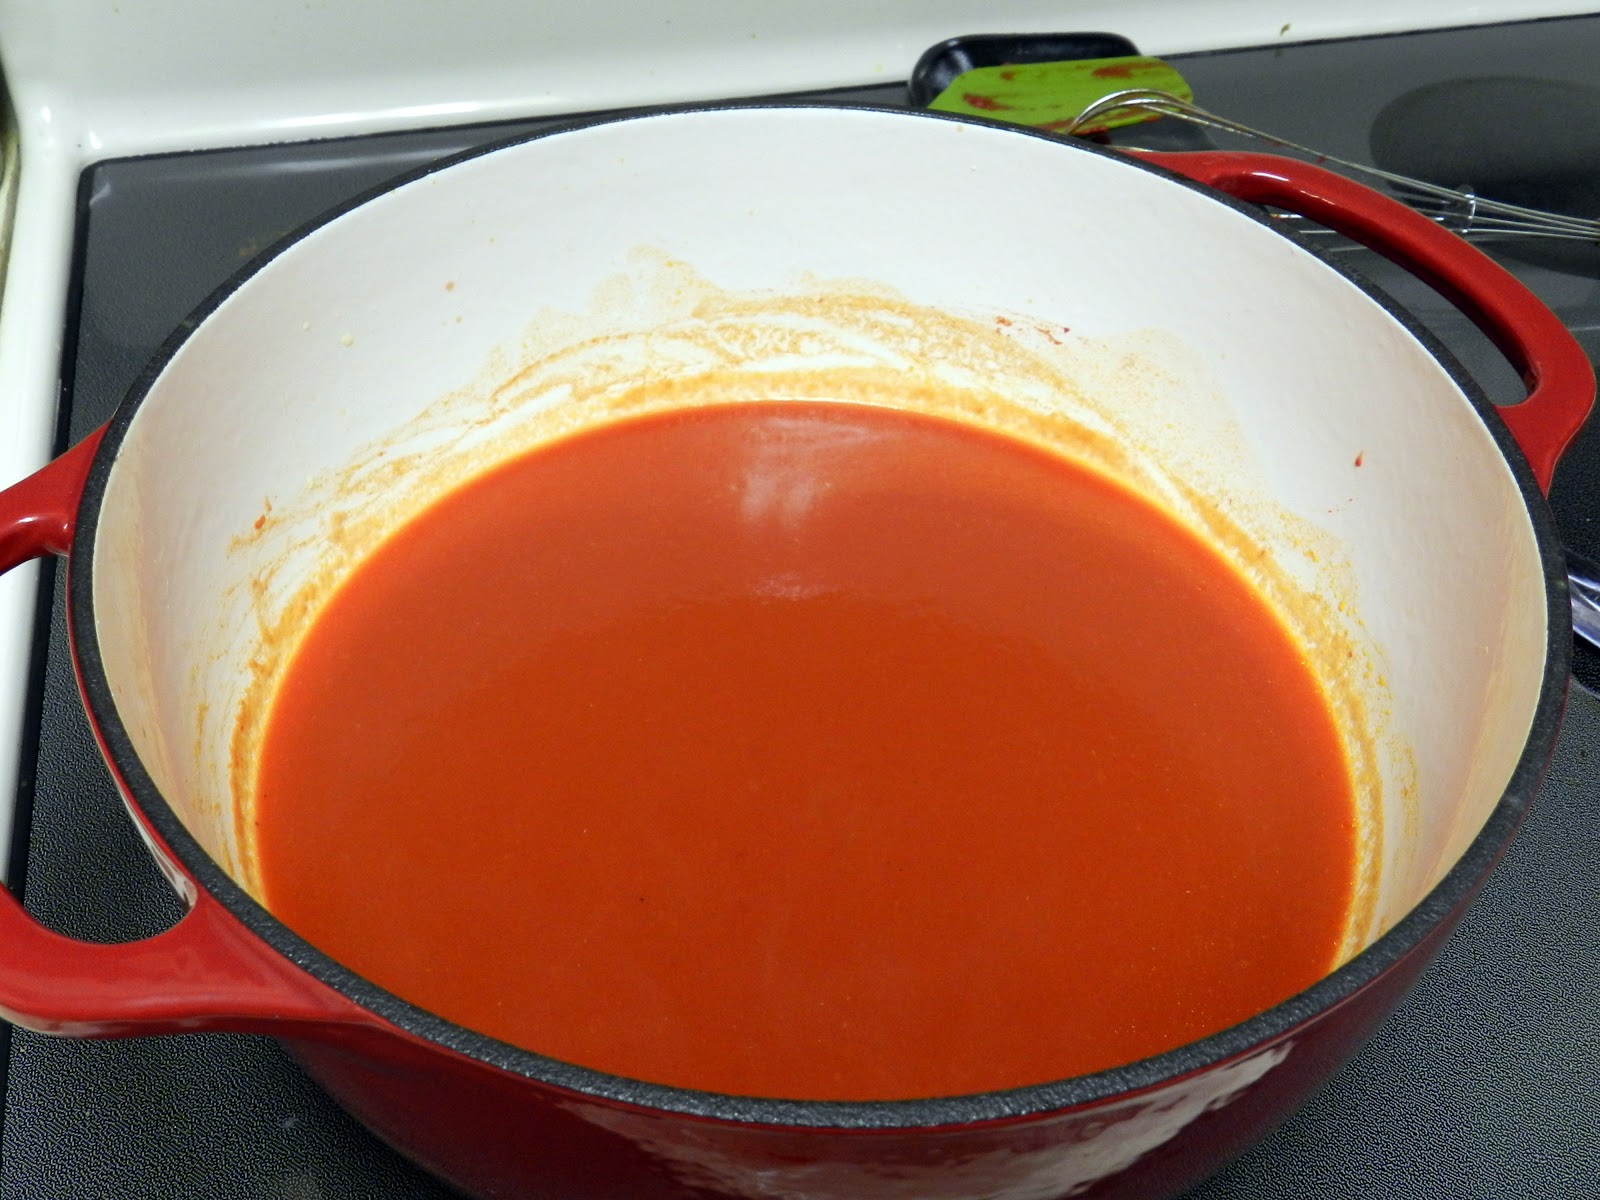
While the veggies are roasting, prepare the soup base. In a large soup pot (I used a large dutch oven for even heating), drizzle a few tablespoons of oil in. Put all of the tomato paste into the oil and stir over medium heat to smooth out. Pour in 3/4 of the carton of broth, and stir until well combined. When the veggies are done, use a slotted spoon to put them into the broth (you don't want too much of the oil from the roasting pan in the soup). Bring to a boil, then simmer for 15+ minutes until all the veggies are soft. Tear up the basil leaves and add into soup. If you want, you can add 1/4 cup of dry white wine (I did not do this). Add 1/4 cup of heavy cream and shredded cheese. Use an immersion blender to puree the soup until thick and creamy. Serve with more cheese and a large chunk of french bread.


Big pot o' yummy!

Update: I made this soup again... this time without peppers and added a good sized clump (~1/2 cup) of sundried tomatoes and a few tablespoons of pesto! Amazing!

Sunday, August 26, 2012

Escarole Soup

This week has been pretty crazy. First, I totaled my second car in three months, the bought a new car. Also, tropical storm Isaac came barreling towards Florida but it turned West and only dumped us with rain and wind. Thankfully, despite it moving westward, FAU cancelled work on Monday! Woohoo!!!

Exciting week all around...

Also, for anyone who lives in the SE US, I highly recommend checking out Annie's Organic Buying club. For $45, you get a two week supply of organic produce. Here's how it works: every other week you stop by a coordinator's house and pick up a huge box of produce. Its different every week depending on what's available locally and in season. Its a really good value and it pushes me to try new produce. Case in point: escarole.

I don't think I've ever had escarole before receiving it in my produce box a month or two ago. At first, I just thought it was another lettuce, like one would find in a spring mix, but after a bite or two I realized the texture and taste wasn't really ideal for raw noshing. I did a little research and found this amazing recipe for escarole soup.

And this soup is the amazing. I've made it twice now and it keeps getting better. 

Escarole Soup adapted from:
http://achowlife.com/2009/01/home-back-in-game.html
1 tsp olive oil

1 lb. hot Italian sausage, casing removed and cut into bite size pieces
5 large garlic cloves, minced
pinch of red pepper flakes (I used a palm full, but we like spicy food)
1 head escarole, trimmed and cut into 2 inch pieces
3 cups chicken broth/ stock
3 cups canned beans, such as great northern (white) or navy, drained and rinsed
1/2 cup finely grated Parmigiano-Reggiano cheese
1/2 stick unsalted butter (you can go a little light on this if you want)
2 tblsp. chopped fresh flat leaf parsley
2 plum tomatoes, diced
Salt and fresh pepper to taste
Heat oil in a deep 12 inch skillet (or dutch oven) over moderately hight heat until hot but not smoking. Brown sausage, stirring, for 7 to 10 minutes. Add garlic and red pepper flakes, and cook, stirring, until the garlic is softened about 2 minutes. Add escarole and cook, stirring, until wilted, about 2 minutes. Add beans and cook, stirring for 1 minute.
Add stock and bring to a gentle boil. Stir in butter, cheese, tomatoes, and half of parsley and cook, stirring, until butter is melted and stew is heated through. Season with salt and pepper.
Ladles stew into bowls and sprinkle with remaining parsley. Serve with extra-virgin oil and Parmesan. 
The soup will get better as it sits for a day or two in the fridge and the flavors meld. 

Done!

Bonus photo: Hurricane Breakfast 
(Waffles, Champagne Grapes, Starfruit, and a Caramel Latte)


Saturday, August 18, 2012

Crispy Honey Crunch Chicken Breasts

When given a choice between steak, pork, seafood, or chicken, my husband will always choose chicken. It kind of baffles me. I grew up eating a different meat every night, seldom having one type of meat twice in a row (except for Thanksgiving when we had leftover turkey for a month). Not my husband. He would eat chicken every night of the week without complaint.


Because of this, I've become very good at making a vast variety of chicken dishes so that I don't become too bored. Chicken Alfredo with spinach on Monday, General Tso's Chicken on Tuesday, Chicken Quesadillas on Wednesday, BBQ Chicken on Thursday, and then maybe something with sausage (Pasta a la vodka with sausage) on Friday for some variety. This is how it goes.

Therefore, I'm always on the lookout for new chicken dishes that are quick to make on a weeknight. Here is one of my new favorites. This is an especially quick meal to make if you do a little prep beforehand. It is also good for using up some of those spices from the back of your pantry. Adjust the spices to your liking.

Crispy Honey Crunch Chicken Breasts
Chicken & Breading:
3 boneless skinless chicken breasts (or 6-8 cutlets)
2 cups flour (wholewheat is good too)
4 tsp salt
4 tsp pepper
3 tbsp ginger
2 tbsp nutmeg
2 tsp thyme
2 tsp sage
2 tbsp paprika
1 tsp cayenne pepper
4 eggs
8 tbsp water
oil


Sauce:
several cloves of garlic
1 cup honey
1/4 soy sauce (low sodium)
1 tsp black pepper

First, slice the chicken breasts so that you have two cutlets. Then, place one slice at a time between two sheets of cling wrap and pound them out with a large blunt object (I have a meat hammer, but you can use a jar or heavy pan). This can be done beforehand or you can just buy cutlets (but I think the price they charge for cutlets is outrageous).

Sift together the flour and spices in a large flat bowl or pan (pie pans work well for this). In another flat bowl,  scramble the eggs together with the water to make an egg wash. 

Heat enough oil in a large pan with enough oil to cover the bottom of the pan. Then, take one chicken cutlet and cover it with the flour mix. Next dip it in the egg wash, and then back into the flour, patting the flour into the meat. Shake off the excess and put it into the hot pan to cook. Do this will all the chicken, careful not to over crowd the pan. When the chicken is brown (watch closely so it doesn't burn) place on a cooling rack laying in a baking sheet and keep it in a warm oven. Finish all the chicken.

Next, drain the oil out of the pan and add a tablespoon or so into the pan with the garlic. Cook the garlic for a minute and then add the honey and soy sauce mix. Carefully cook the honey mix down into a thick sauce. Remove the honey sauce from the pan.

If desired, add some greens into the hot pan (I used arugula) to wilt. Just stir the greens around for a minute or two and let them pick up the leftover sauce in the pan and golden bits from the chicken.

Serve the chicken on a plate, top with greens and sauce, and a side of roasted potatoes. Enjoy!

Monday, August 13, 2012

Summer Fun: Strawberry Peach Lemonade and Cold Brewed Ice Coffee

Summer is wrapping up and back to school supplies are on sale all over town. But before its too late, its time to taste some of the fantastic flavors of the summer before its too late.


I was reading a list the other day of 50 things to do before the end of summer. Sadly, I hadn't done more than a hand full of them. But with summer being a year-round season in FL, I don't feel too badly. Plus, as any Floridian knows its best to do "summer fun" in the winter when you don't want to just sit inside an air conditioned building.

On my list of summer completes:
Outdoor concert
Beach
Frozen Custard
Watching thunderstorms roll in
Eating fresh produce
Summer fruit pie
Make lemonade from scratch...

Strawberry Peach Lemonade
1 cup sugar
4 large lemons (3/4 cup of juice)
1 cup strawberries
1 large ripe peach

Combine the sugar with 1 cup of water in a small saucepan. Boil the sugar and water for a minute or until the sugar has completely dissolved into the water. Set aside to cool.

Squeeze the lemons. Put the strawberries and peach (minus the pit) into a blender. Add the lemon juice to the blender and pulse until completely liquid. Strain the lemon and fruit mix through a mesh strainer into a pitcher to remove seeds and pulp. Add simple syrup (sugar mix) and add another 4 cups of cold water. Serve over ice.

Also really good with Malibu rum!

If you're at all like me, you enjoy a nice glass of iced coffee on summer mornings. But if you've ever brewed yourself a pot of coffee in the hopes of making yourself some iced coffee, you've likely been disappointed by the results. Cold coffee, but bitter and in need of a lot of additives to make it drinkable.

The trick to good iced coffee it to "cold brew" it! It allows the mellow cocoa flavors to develop without the bitterness of cooled hot coffee.

Cold Brewed Ice Coffee
1 cup coffee grounds
4 cups water
Cream and sugar to taste


Put the coffee grounds into a large bowl with the 4 cups of water, stir. Let it sit (covered) overnight, or at least 6 hours. Strain with a coffee filter in a mesh strainer. This is your coffee base. This can be stored in the refrigerator for up to two weeks.

To make in the morning: Mix your coffee base with 1 cup of water. Cream and sugar. Add ice as desired. Enjoy!

Takes less time to make in the morning than brewing normal coffee or stopping into dunkins!

Sunday, July 29, 2012

Pretzels

I've been feeling pretty absent from my blogging lately. It isn't that I haven't been baking/cooking. I have. I just haven't had time to photograph, edit, and write about my baking/cooking.

Cinnamon & Sugar Pretzel with Caramel Dipping Sauce


Its been a bit crazy over here. Since June I've traveled to Minneapolis, then home, to Wisconsin, then home, to California, the home, and wrote my thesis proposal. Again, its been a bit crazy.
California is pretty

Elephant Seal

Pacific Coastal Highway

Anyways, now that things have settled down for awhile (or at least this weekend), I'm going to tell you about my homemade soft pretzels.

A few years ago, I saw Alton Brown make his own pretzels on his show Good Eats (amazing show!!!). I was surprised to learn about how the dark brown color is achieved on pretzels. 

To get that traditional pretzel color, one must use a little chemistry. The brown color can only be accomplished by boiling the unbaked dough in water and baking soda. Something about the pH of the dough needs to be altered to get that dark coloring. If you really want to know more, watch the episode.

Soft Pretzels:

Ingredients:

  • 1 1/2 cups warm water
  • 2 tablespoons light brown sugar
  • 1 package active dry yeast (2 1/4 teaspoons)
  • 3 ounces unsalted butter, melted
  • 2 1/2 teaspoons kosher salt
  • 4 1/2 to 5 cups all-purpose flour
  • Vegetable oil
  • 3 quarts water
  • 3/4 cup baking soda
  • 1 whole egg, beaten with 1 tablespoon cold water
  • Coarse sea salt

Directions:


  1. Combine the water, sugar, yeast, and butter in the bowl of a stand mixer and mix with the dough hook until combined. Let sit for 5 minutes. (Check the expiration date on your yeast. If its like mine and over a year past its prime, you may have to add a bit more. Also, store your yeast in the fridge but take it out a bit before using it to let it wake up a bit.)
  2. Add the salt and flour and mix on low speed until combined. Increase the speed to medium and continue kneading until the dough is smooth and begins to pull away from the side of the bowl, about 3 to 4 minutes. If the dough appears too wet, add additional flour, 1 tablespoon at a time (I had to use almost 5 1/2 cups of flour because of FL humidity).
  3.  Remove the dough from the bowl, place on a flat surface and knead into a ball with your hands.
  4. Oil a bowl with vegetable oil, add the dough and turn to coat with the oil.
  5. Cover with a clean towel or plastic wrap and place in a warm spot until the dough doubles in size, about 1 hour.
  6. Preheat the oven to 425 degrees F.
  7. Bring the water to a boil in a small roasting pan over high heat and add the baking soda.
  8. Remove the dough from the bowl and place on a flat surface. 
  9. Divide the dough into 8 equal pieces, about 4 1/4 to 4 1/2 ounces each. 
  10. Roll each piece into a long rope and shape into the lengths or shapes that you want (sticks are easy and tasty).  Keep in mind the dough will puff up again in the oven so thinner is probably better.
  11. Boil the pretzels in the water solution in batches. Boil for about 30 seconds. Remove with a large slotted spoon. 
  12. Place pretzels on a baking sheet that has been sprayed with cooking spray. Make sure they are not touching. 
  13. Brush the tops with the egg wash and season liberally with the salt. 
  14. Place into the oven and bake for 15 to 18 minutes until golden brown.
  15. Add additional toppings immediately after they come out of the oven. If you want, brush on some melted butter and roll the pretzels in cinnamon and sugar. Use caramel as a dipping sauce (this is heavenly!)
With cinnamon & sugar


Regular salted